watari開発 – Advent201914 –

stage14: twitter連携投稿
twitter loginができるようになったので accessToken と secret が取得できるようになった。
これを使えばtwitter apiが叩けるはず。
まずは、
credentialを保存
keychainの方が良さそうなのでそこに保存するようにしてみよう。
参考: https://github.com/OAuthSwift/OAuthSwift/wiki/Store-credential
https://github.com/phimage/Prephirences
これを使うらしい。
Podfileに pod 'Prephirences' を追記して次のコマンドを叩く。
pod install前回のaccessTokenとかsecretを取得していた部分を以下のように変更する。
import Prephirences

let keychain = KeychainPreferences.sharedInstance

...
if let credential = result?.credential as? OAuthCredential,
    let accessToken = credential.accessToken,
    let secret = credential.secret {
        self.keychain.set(objectToArchive: [accessToken: accessToken, secret: secret], forKey: "twitter")
    }
...
で、保存した値を投稿時に使うので、addボタンのところで取り出してみよう。
Button("add", action: {
    ...
    if let credential = self.keychain.dictionary(forKey: "twitter") {
        print("accessToken in add button: " + (credential["accessToken"] as! String))
        print("secret in add button: " + (credential["secret"] as! String))
    }
})これで確認する。(サンプルの例とは少し違うのは、Prephirences の保存方法が少し変わったのかstringで保存することができなかったのでdictionaryにした)

これで使える。
tokenを使って投稿してみる
https://developer.twitter.com/en/docs/tweets/post-and-engage/api-reference/post-statuses-update
このapiを叩けばいいのだが、
To obtain the generated oauth_nonce, oauth_token, and oauth_signature you can use a REST tool such as Insomnia or Postman.
これ絶対自作しなくて良さそう。 Swifter を使ってみることにする。
Installation
If you’re using Xcode 6 and above, Swifter can be installed by simply dragging the Swifter Xcode project into your own project and adding either the SwifteriOS or SwifterMac framework as an embedded framework.
とのことなので
git clone https://github.com/mattdonnelly/Swifter.git
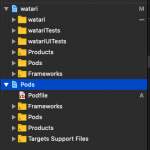
open SwifterSwifter.xcodeproj をdrag and dropする。

こんな感じの見た目になる。さらに embedded framework にしなさいとのことなので、
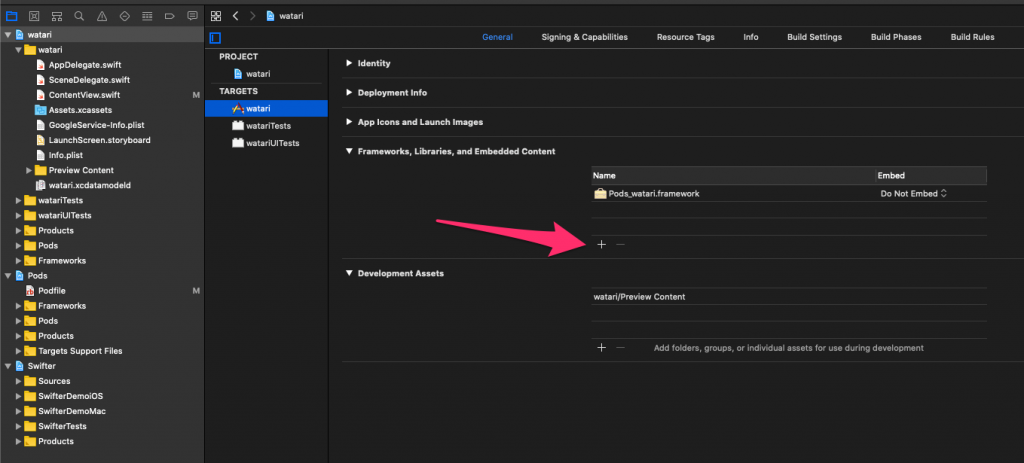
watari projectのgeneral設定から Embedded Contentを見つけて追加する。
欲しいのは SwifteriOS.framework なので選んでAdd。
addボタンのkeychainから値が取れたところでお試し投稿のコードを追加する。
import SwifteriOS

...

if let credential = self.keychain.dictionary(forKey: "twitter") {
    print("accessToken in add button: " + (credential["accessToken"] as! String))
    print("secret in add button: " + (credential["secret"] as! String))
    let swifter = Swifter(consumerKey: "<secret>",
                          consumerSecret: "<secret>",
                          oauthToken: credential["accessToken"] as! String,
                          oauthTokenSecret: credential["secret"] as! String)
    swifter.postTweet(status: "テスト投稿 by アドベントカレンダー!", success: { status in
        print("succeeded.")
    }, failure: { error in
        print("failed.")
        print(error)
    })
}
こんな感じ。
https://twitter.com/toriumi0118/status/1205888253133389824
できたぞい!
次は
自分がアプリ内に投稿した文章をそのまま投稿する修正を追加する。
おまけで、
https://qiita.com/k-boy/items/c83a0505d12cc8e7d4b9#%E8%BF%BD%E8%A8%98
ここにある通り、
ViewControllerをSFSafariViewControllerDelegateに準拠させること
というやつと、
現状でconsumerKeyとconsumerSecretがハードコードされている。このままだとgithubにあげづらいので、アプリエンジニアはどうやっているのかちょっと調べてみる。
参考
https://www.slideshare.net/ngzm/oauth-10-oauth-20-openid-connect
- 前の記事
watari開発 – Advent201913 – 2019.12.13
- 次の記事

watari開発 – Advent201915 – 2019.12.15